Every project starts with a short list of files. This page is the whole list, with how to shoot each one and what we do with it afterwards, so nothing bounces back and forth for a week. Most people send everything in one go and we start the same day.
You bring the things only you have. We make everything else.
There is a common worry that we will ask for a photo shoot before we can replace your photo shoots. We will not. What we need from you is the handful of things that cannot be invented: your face if you want a double of yourself, and your actual product if the work involves one. Wardrobe, location, lighting and styling are ours.
What we need from you
Your face, if the character is you. Your product, shot from a few set angles, if the work features it. A sense of who you are selling to. That is the whole list, and for a brand-new character with no product involved it is just the last one.
Usually under an hour of your time
What we make from there
The character themselves, every outfit, every location, the lighting, the styling, the camera angles, the movement, the voice, the captions and the crops for each platform. None of it needs you present, and none of it needs booking.
Everything after the files
02 · A digital double of you
Twelve to twenty photos of your face.
This is the one that makes people nervous, and it is genuinely simple. Your phone is fine. What matters is even light and a consistent look across the set, not camera quality. Half an hour by a window covers it.
◆The shots we need
01
Straight to camera, neutralFour or five. Looking at the lens, relaxed face, mouth closed. These carry the most weight, so shoot these first while you still look fresh.
02
Three-quarter, both sidesTwo or three each way. Turn your shoulders about forty-five degrees but keep your eyes on the lens.
03
Full profile, both sidesOne each way. Looking straight ahead, not at the camera.
04
Smiling and talkingThree or four. A real smile, and a couple mid-sentence with your mouth open. This is what teaches us how your face moves.
05
Three or four full lengthStanding, arms relaxed, head to feet in frame. These set your build and proportions.
◆How to shoot them
01
Face a window, on an overcast day if you canSoft daylight from the front. Avoid direct sun, overhead ceiling lights and anything that throws a hard shadow across half your face.
02
Plain wall behind youA blank wall, a door, a curtain. Anything busy behind you makes the edges of your hair harder to read.
03
Turn off every filterNo Portrait mode, no beauty smoothing, no auto-enhance. Those quietly change your face, and we end up building someone slightly else.
04
Hair and grooming as you normally areNot a special occasion version of you. If you wear glasses daily, keep them on for half the set and take them off for the other half.
05
All in one sitting, recentThe whole set on the same day so your hair, weight and skin match. Photos spanning two years give us two different people.
Profile
Three-quarter
Front
Three-quarter
Profile
Profile
Three-quarter
Front
The same five angles, whoever is in front of the lens. Shoulders up, eyes on the lens except in the profiles, and nothing between you and the light. Both of these sets are our own characters, shot exactly the way we are asking you to shoot yourself.
◆Please do not send
Mirror selfiesThe phone covers part of your face and the reflection flips your features, which trains a mirrored version of you.
Group photos or cropsCropping one face out of a wedding photo leaves us with about forty pixels of detail to work from.
Anything already editedRetouched, filtered, colour-graded or screenshotted. We need what the camera actually saw.
03 · A brand-new character
No files at all. Just a direction.
If the character is not you, there is nothing to photograph. What we need instead is enough direction that the person we design is aimed at your customers rather than at our taste. A ten-minute message usually covers it.
01
Who they are talking toAge, country, what they buy from you and why. The character exists to be believable to those people specifically, not to be generically attractive.
02
Three to five accounts you like the look ofNot to copy. It is the fastest way to show us a tone, because "clean and premium" means six different things to six people.
03
A rough brief on the personAge range, build, hair, and the general feeling. Approachable or aspirational. Polished or off-duty. Say it however it comes out; we will shape it.
04
Wardrobe directionThe kind of clothes your customers would expect to see. If you sell the clothes, that part is answered for us.
05
Anything they must never doProducts they should not be seen with, claims they must not make, a tone that would not sit right with your audience. Easier to set now than to unpick later.
06
A name, or leave it to usSome people arrive with one. Most do not, and we come back with three options alongside the first look.
04 · Product and clothing shots
Your product, from set angles, on a plain background.
This is the part people most often send wrong, so it is worth two minutes. We can put your product into any scene, on any character, in any light. What we cannot do is invent the side of it we have never seen. Shoot it once, properly, and it works for every image after that.
◆Angles for any product
01
Straight front and straight backCamera level with the middle of the product, not looking down at it.
02
Both sidesStraight on from the left and the right.
03
Three-quarter, both sidesRotated about forty-five degrees each way. These two do most of the work in a lifestyle shot.
04
Top downLooking straight down at it, flat on the surface.
05
Every detail that mattersLogo, label, texture, stitching, closure, spout, hardware, screen. One close-up each. If a customer would zoom in on it, photograph it.
06
Every colourwayEach colour you want shown, in the same angles. We cannot recolour a product reliably enough to sell it.
◆How to shoot them
01
Plain, light backgroundWhite or light grey. A sheet of paper, a wall, a tabletop. Nothing patterned, nothing coloured, nothing reflective under it.
02
Soft even light, no direct sunWindow light on a cloudy day is close to perfect. Hard shadows and coloured room lamps get baked in and fight every scene we place it in.
03
Whole product in frame, with air around itNever cropped at the edges. Leave a margin on all four sides so we have room to cut it out cleanly.
04
Clean it firstFingerprints, dust and lint are all still there at full resolution, and removing them from forty images costs real time.
05
One product per photo, nothing heldUnless a hand is the point of the shot. Fingers across a label are the single most common reason we have to ask again.
06
Phone is fine, filters are notPortrait mode blurs the edges we need sharp. Turn it off, along with any auto-enhance.
Front
Three-quarter
Side
Back
Three-quarter
Detail
A usable set looks like this. One product, one background, one light, rotated between frames and nothing else changed. The brand on the bottle is invented, so this is also what we can build for a product that does not have its packaging photographed yet.
◆If it is clothing
Flat lay, front and backOn a clean surface, garment pulled straight, seams square, no creases from the packaging.
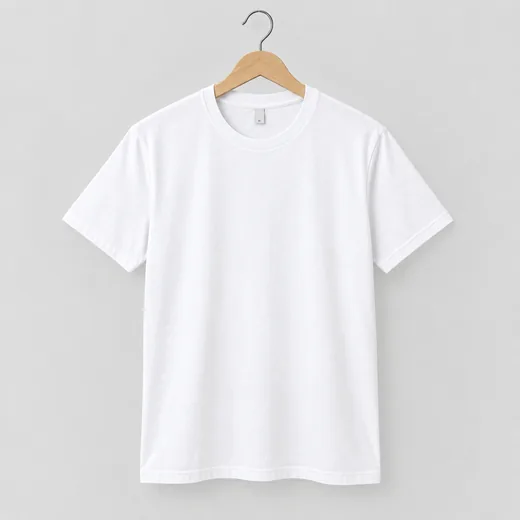
On a hanger or mannequinIf you have one. It shows us how the fabric falls, which a flat lay cannot.
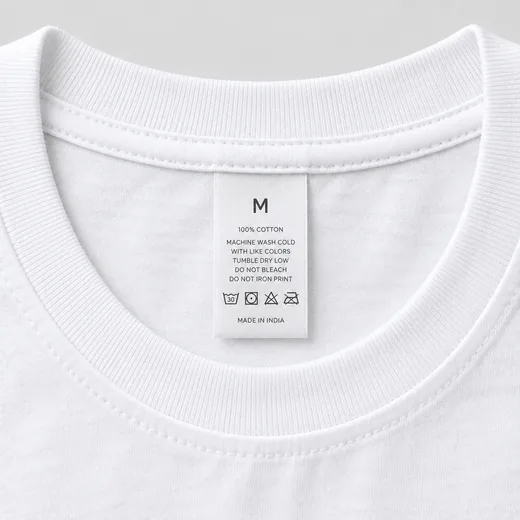
Fabric, label and hardware close upTexture, weave, stitching, zips, buttons, care label. This is what stops the garment looking printed on.
Send every size you want shown on a different body type. A piece photographed in one size can be shown on one build convincingly, and stretching it further is where AI clothing starts to look wrong.
Flat lay, front
Flat lay, back
On a hanger
Collar and label
Four frames, one garment. Flat for the shape, hung for the drape, close for the weave and the label. A plain white tee is the hardest case there is, so if yours looks like this we have everything we need.
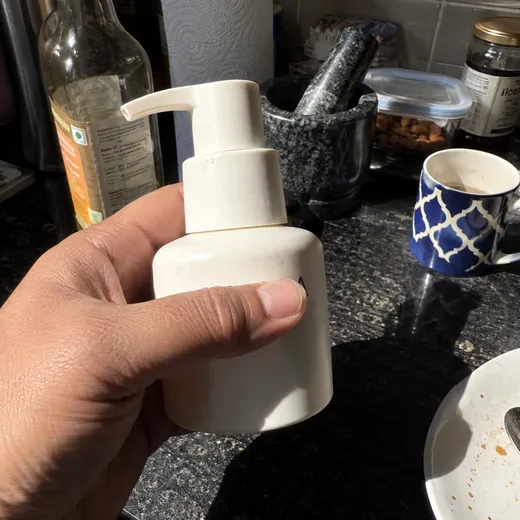
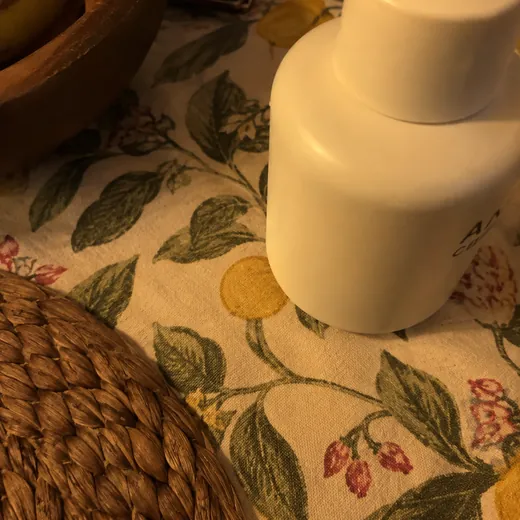
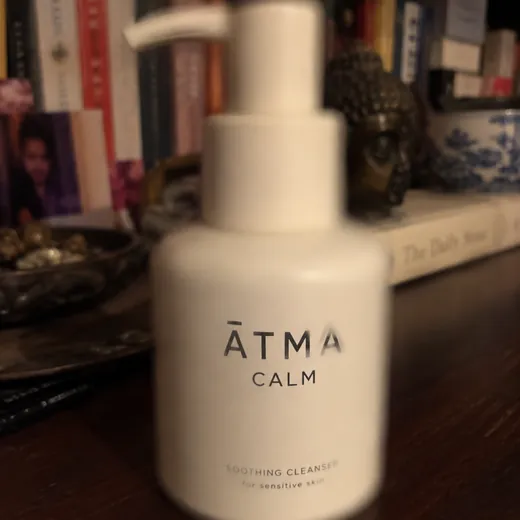
And these are the three we have to send backAll of the same bottle. Every one of them costs a day.
× Hand across the label
× Cropped, on a pattern
× Out of focus
A hand covering the label means we never see what is printed on it. A cropped frame means the top of the bottle has to be invented, and invented packaging is the one thing a client always notices. Soft focus means the label cannot be rebuilt at all. None of these are hard to avoid, and all three take one more minute at the counter.
05 · What we do with it
Your product, our everything else.
Once the files are in, the rest is production, and none of it needs you. This is the part that used to be a shoot day.
WardrobeStyled per shot, per season, per market.
Location and setAny city, studio, interior or street, without travel.
Lighting and colourMatched across the whole batch so the feed reads as one brand.
Framing and cropsSized for each platform, captioned, ready to post.
06 · Formats and how to send
Biggest files you have, straight off the camera.
Every time an image passes through a chat app it is compressed, and that compression is permanent. It is the difference between a product that looks real and one that looks almost real.
◆Formats
01
JPG, PNG or HEIC all workRAW and TIFF are welcome too if you have them. We would rather have too much data than too little.
02
At least 2000px on the long edgeFor product shots especially. Most phones clear this easily on the default setting.
03
Originals, not forwardsPull them from your camera roll or card, not from WhatsApp, Instagram or a website. Those have already been squashed.
04
No watermarks or textNothing burned into the image, including your own logo. We add that at the end if you want it.
◆Sending them
01
WeTransfer, Drive, Dropbox or iCloudA link to a folder is easiest. A zip is fine. Email attachments are fine for a handful.
02
Name the folder with your brandAnd put product shots and face shots in separate subfolders. It sounds fussy; it saves a round of questions.
03
Send it to hello@invasived.comOr reply on whatever thread we are already on. One message with everything beats five with one file each.
04
Tell us what is missingIf you cannot get one of the angles, say so rather than leaving a gap. There is usually a workaround, and knowing early is what keeps the timeline.
07 · What happens next
Files in, first look in about 48 hours.
No call needed at any point, unless you want one.
01
We check the files the same dayIf something is unusable we tell you immediately with a photo of what we mean, rather than quietly working around it.
02
First character direction within 48 hoursReal options, not mood boards. You pick a direction or tell us what is off, and we lock it.
03
First batch inside a weekPhotos and videos across the scenes you actually need, captioned, sized and ready to post.
04
After that, hours not weeksThe person already exists. New looks, new scripts, new languages and new campaigns are quick work from then on.
08 · The checklist
Copy this into a note and tick it off.
If every line here is done, we have everything and nothing will come back to you.
◆If the character is you
12 to 20 photos, one sitting
Front, three-quarter and profile, both sides
A few smiling, a few mid-sentence
Three or four full length
Window light, plain wall, no filters
◆If there is a product
Front, back, both sides, both three-quarters, top
A close-up of every detail that matters
Every colourway, same angles
Plain background, soft light, nothing held
Originals, 2000px or more, no watermarks
Not sure about something?
Send what you have and ask. We would rather look at it and tell you than have you spend a weekend reshooting something that was already fine.
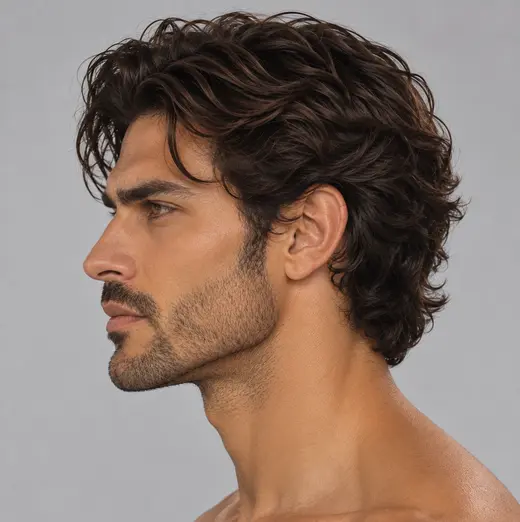 Profile
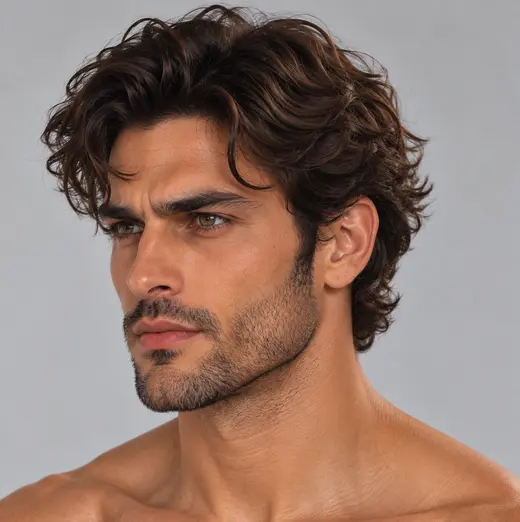 Three-quarter
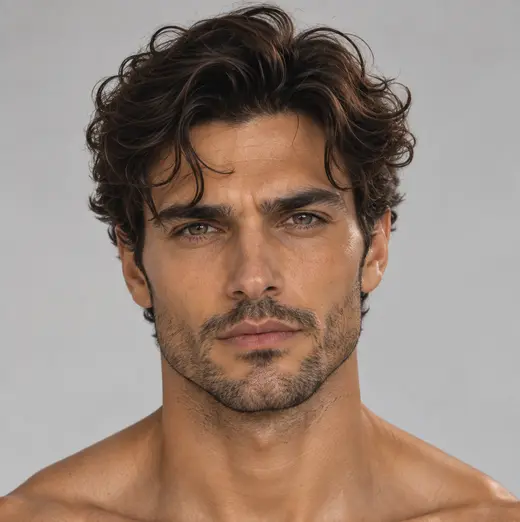 Front
Front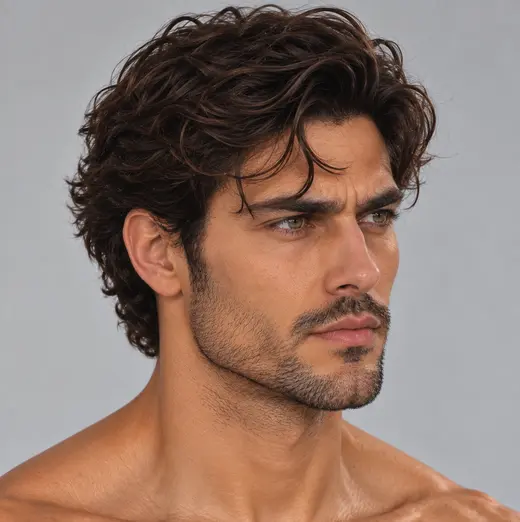 Three-quarter
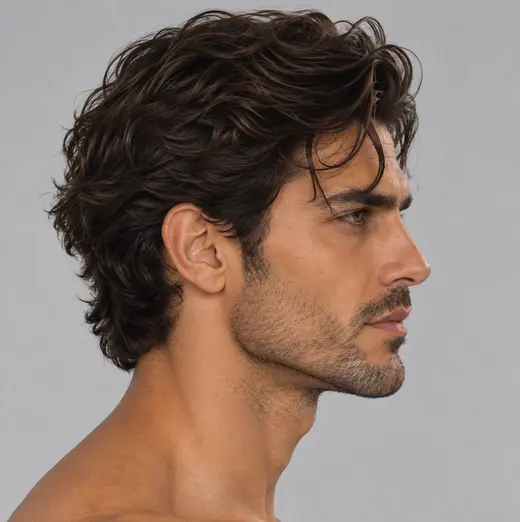 Profile
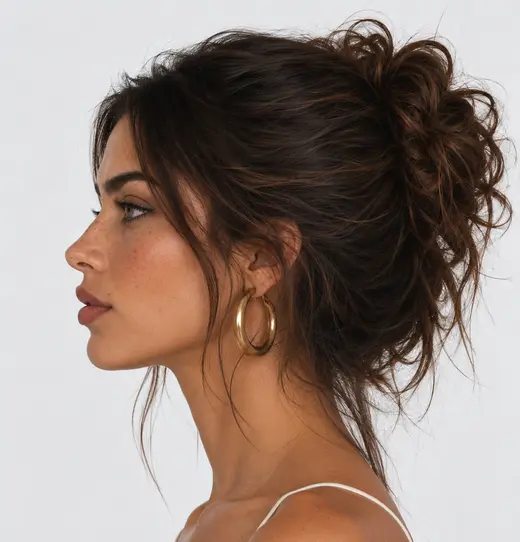 Profile
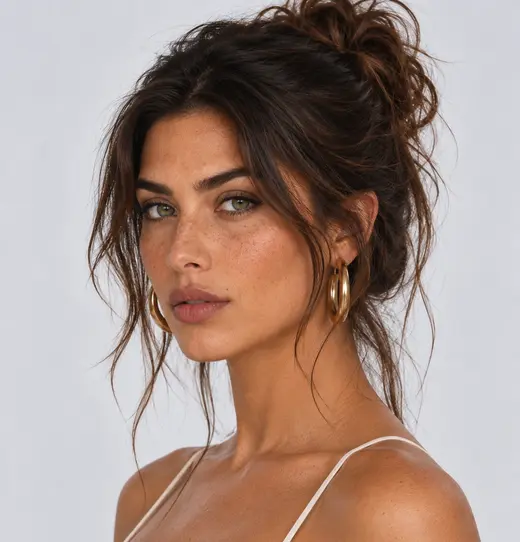 Three-quarter
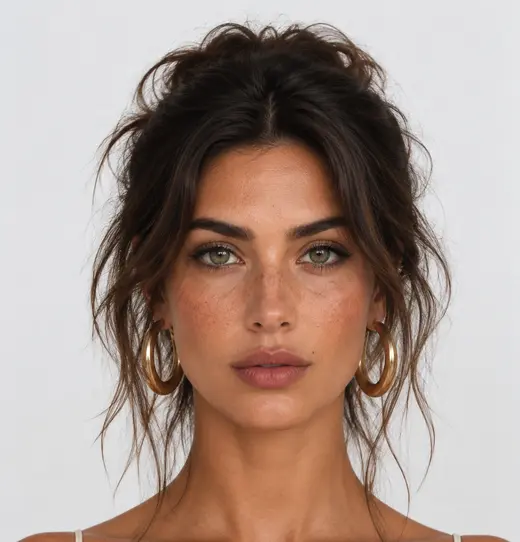 Front
Front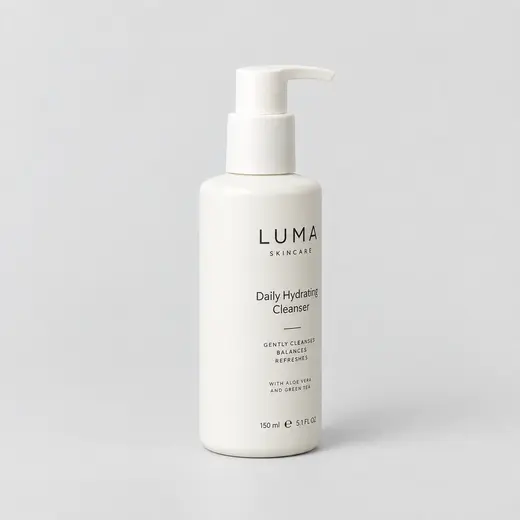 Front
Front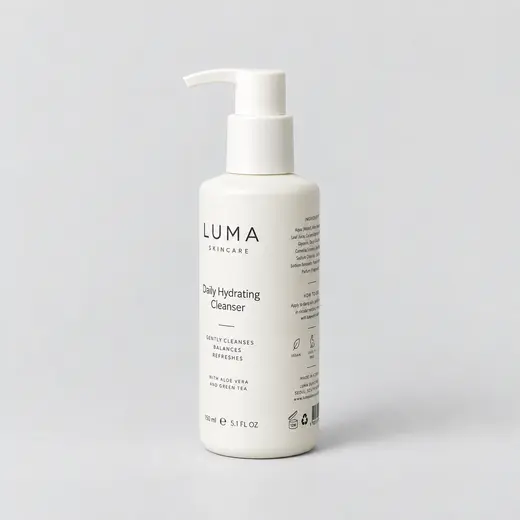 Three-quarter
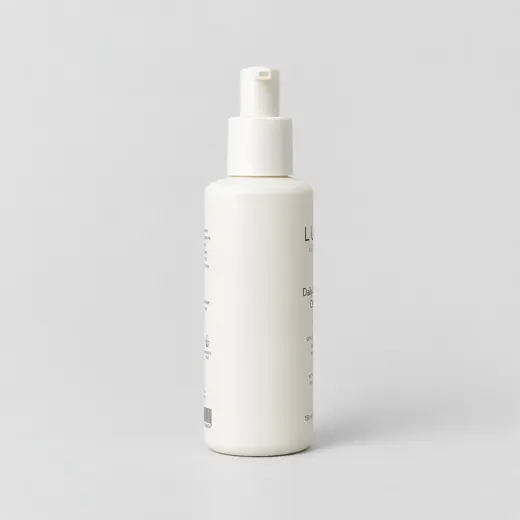 Side
Side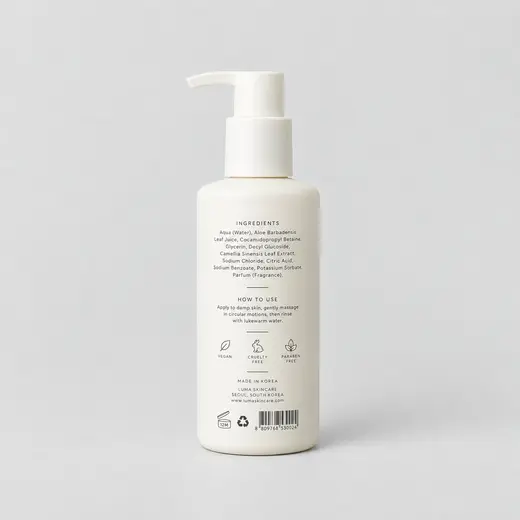 Back
Back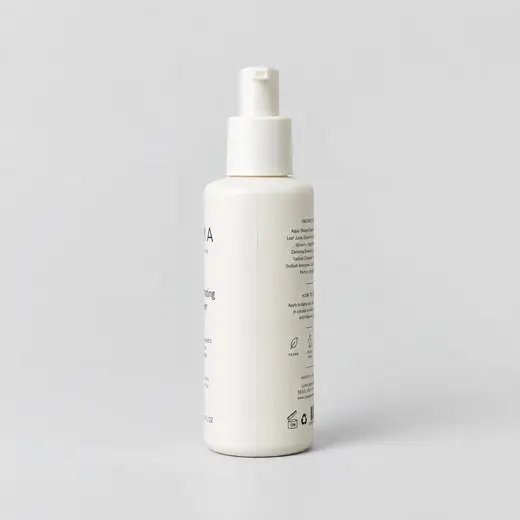 Three-quarter
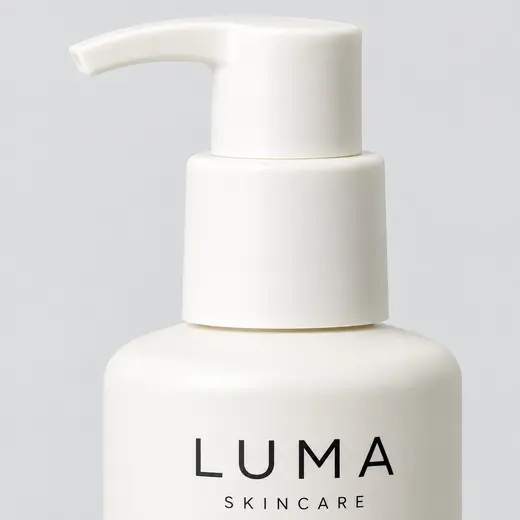 Detail
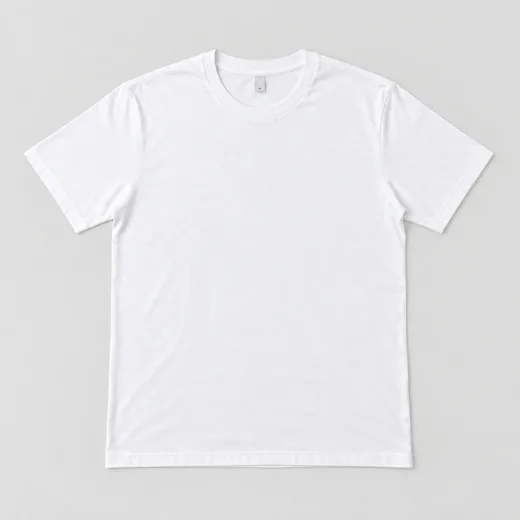 Flat lay, front
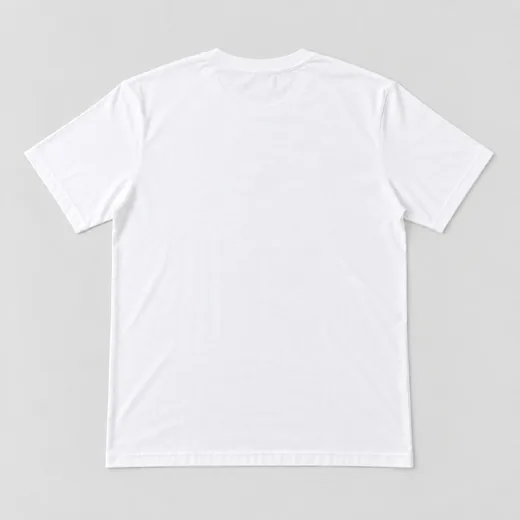 Flat lay, back
 On a hanger
 Collar and label
 × Hand across the label
 × Cropped, on a pattern
 × Out of focus